Set up your first forecast
Connect your data, create a forecast, and check the result.
You do not need to get everything perfect today.
Start by getting a forecast on screen. Once you can see the numbers, it is much easier to decide what needs changing.
Before you start
You need an organisation in Budgee before you can build a forecast. You can either connect accounting software such as Xero, or start from a template if you want to explore Budgee with sample structure first.
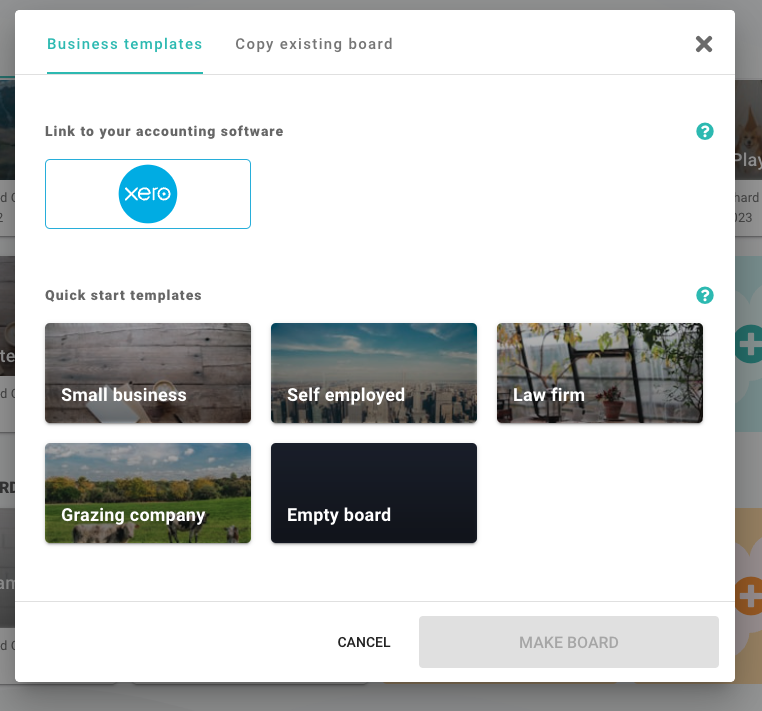
1. Create or import the organisation
Start by creating the organisation in Budgee. If you connect Xero, bring in enough history for the forecast to have useful patterns. Around one year is usually a good starting point.
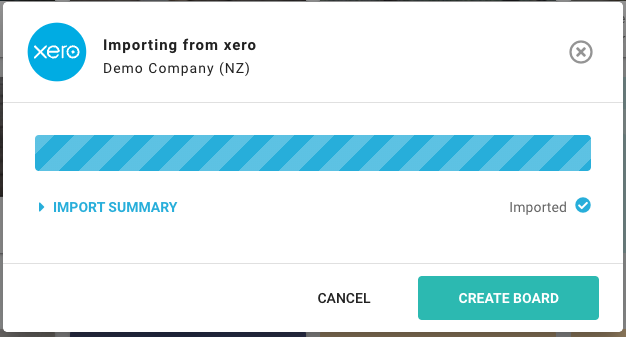
When the import finishes, Budgee opens the board. More detail can be found in the create or import guide.
Xero imports run in the cloud, so you can leave the page while a larger import runs and return to the current progress later.
2. Start on the Cash Summary tab
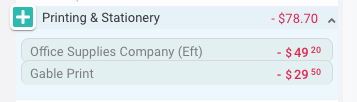
The Cash Summary tab helps you quickly see where money is coming from, where it is going, and what is driving the totals. It does this by grouping cash into incoming, outgoing, and transfers, then further splitting those groups into categories from your Chart of Accounts. Open a few categories to see the transactions behind the totals.
Do not worry about learning every setting yet. The goal is to recognise the main cash movements before generating the forecast.
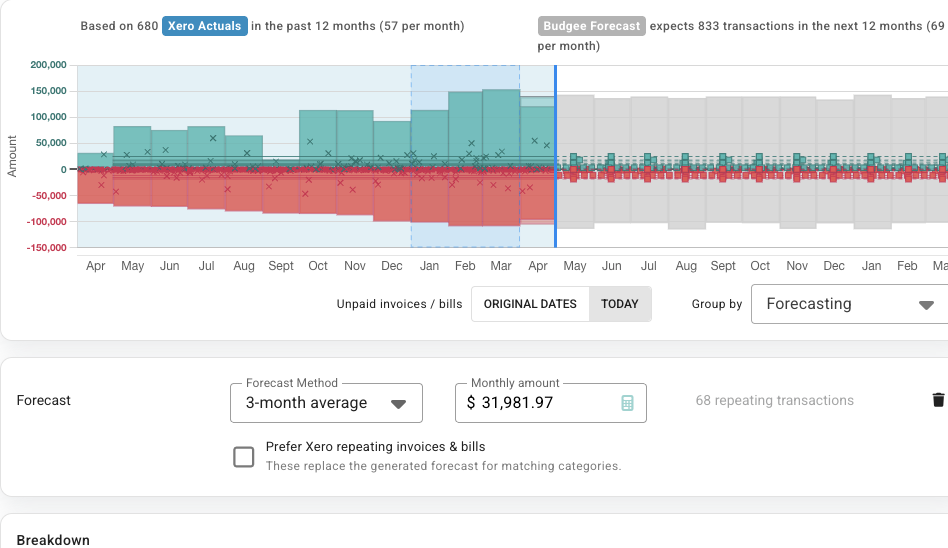
3. Generate the first forecast
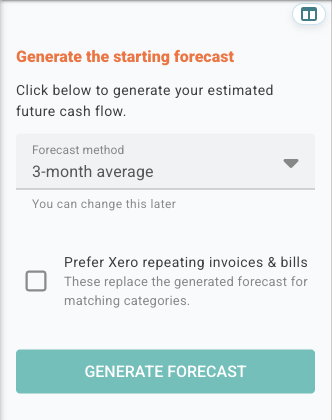
Use the forecasting tool to create your first forecast. Past cash movements are often the best starting point for predicting future cash flow, so Budgee includes forecast methods that look at the patterns in your history.
Do not worry too much about choosing the perfect method now. This is just the first pass, and the forecast is easy to change later. Choose a sensible method, generate it, then review the result.
If Budgee offers to use Xero repeating invoices and bills, turn that on when those repeating items are reliable in your accounting data.
Before turning this on: if Budgee uses Xero repeating items for a category, it treats those items as the forecast for that category instead of also generating a history-based forecast. Use this when the repeating invoices or bills represent the full expected cash flow for that category.
4. Review the forecast assumptions
After the forecast is created, look for Forecast assumptions (mth ave) at the top of the forecasting panel. Click the pencil icon beside that heading to open the forecast dialog for the full forecast. You can also click the pencil beside a specific row if you want to review just that part of the forecast.
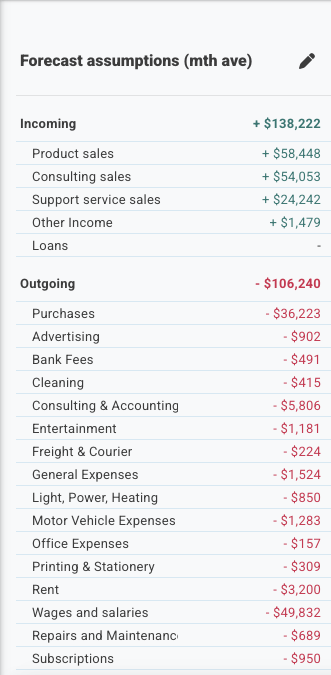
Start with the biggest incoming and outgoing areas first. Only drill into smaller categories if something looks clearly wrong.
You are looking for a forecast that is good enough to review, not a perfect model on the first pass.
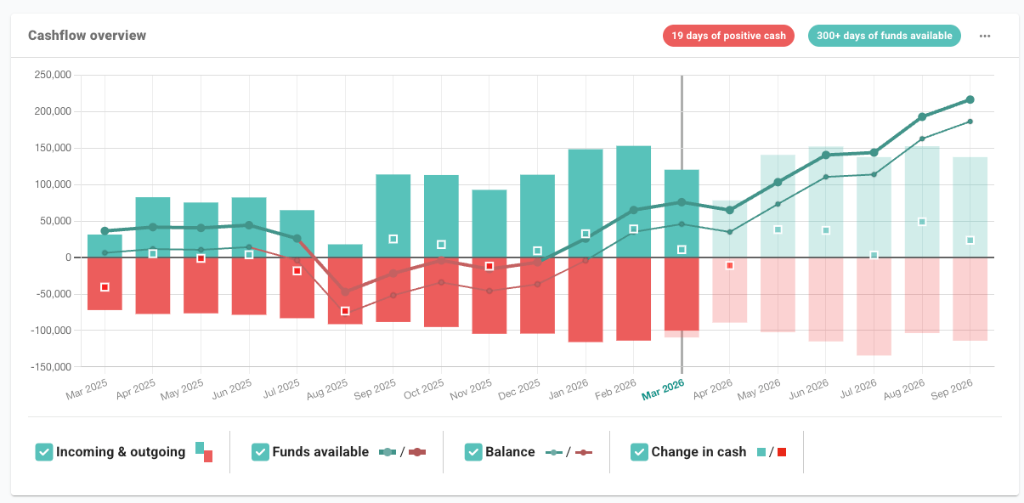
5. Check the Dashboard
Once you are happy with the first forecast, open the Dashboard to check the headline numbers, cash flow chart, and summaries. This is where the forecast should start to feel useful: you can see what is expected to happen, when pressure points appear, and which areas need attention.
6. Try one scenario
Create one small scenario so you can see how Budgee handles possible changes. A good first scenario is something simple, such as delaying a customer payment, increasing one income category, or adding one planned cost.
Turn the scenario on and off, then check the board and Dashboard again. This shows the difference between your base forecast and a possible future outcome.

You are ready when
- You have an organisation open in Budgee.
- You can find the Cash Summary, Dashboard, and All Transactions tabs.
- You have generated a forecast.
- You have reviewed the largest forecast assumptions.
- You can turn one scenario on and off and see the result change.
Once those pieces are in place, move to Budgee basics to understand the key terms, or use the detailed forecasting and scenario guides when you want more control.